
install Ghost CMS on Digitalocean
Ghost is Professional Blogging Platform like WordPress it is an Open Source Project with advanced Javascript Frameworks like Node.js, Ember.js, and Handlebars.
This tutorial we are going to learn about How to install Ghost CMS on Digitalocean
Requirements for Ghost Blog
PS: you no need to Install Manually all are pre-installed with Digitalocean One-click Ghost APP
- Hosting – Cloud-based servers we recommend DigitalOcean [One-click Ghost Application- 10$ Plan and 1GB Ram]
- SSH Terminal for Installation
- Os – Ubuntu
- Server – Nginx
- Framework – Node.js
- Database – MYSQL
- CLI – Ghost-CLI
Steps to install Ghost CMS on Digitalocean Droplet
- Login to your Digitalocean account
- create new Droplet
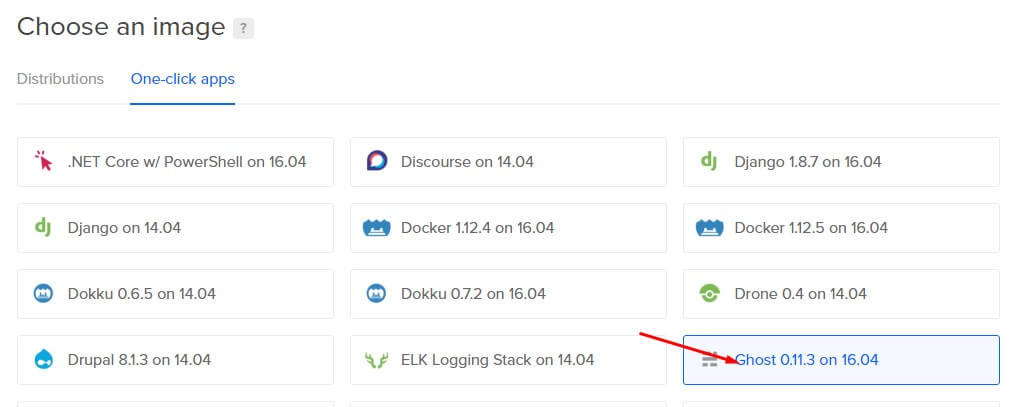
- Choose an Image – Select One click Apps and Choose Ghost
- Choose your Droplet Size if you Running personal blogs 10$ is enough or something big then choose above 10$ plan
- Leave Block Storage
- Pick a datacenter which one Suited for your blog
- In additional Options, Tick IPv6, and Monitoring
- Leave SSH Keys
- Final Step Create Hostname for your Droplet and Click “Create.” Button
- That’s all Successfully we install Ghost CMS on Digitalocean

Important Ghost Installation steps
Now open the Digitalocean Droplet from SSH terminal windows users Download Putty terminal for Manage your Do droplet, Mac and Ubuntu users Manage your DO Droplet from your Inbuilt SSH terminal.
- After creating your New Droplet, you will receive the email from Digitalocean, they send all login credits for your Do droplet
- Login your Do droplet from SSH terminal
- For the first time, It asks to change the root password change it from your SSH terminal
- After changing the password, Update the Packages
sudo apt-get update

sudo apt upgrade
- Next Open the Ghost Installed Folder
cd /var/www/ghost
- Before Installing update the Ghost
ghost update
- Now Setup the Ghost blog
Before adding your Custom domain make sure that your domain was added to the Digitalocean also update the nameservers in your Domain registrant if you are using Subdomain update IP in an A record
ghost setup
Here is the Video for Setup Ghost blog on DigitalOcean
- After all, setup Restart your Ghost Blog
ghost restart
Update URL
- We Need to Update the URL on ghost blog conf File
- it contains two conf files on ghost system folder example.com.conf (Port 80) & example.com-ssl.conf (port 443 for SSL)
- Open that both Files and Update URL because then only your ghost blog will open properly on WWW Version
- Open that two files via Putty/terminal by running this below commands (PS: don’t use this commands at same time) or you can open it via FTP File Location /var/www/ghost/system/files
sudo nano /var/www/ghost/system/files/example.com.conf

sudo nano /var/www/ghost/system/files/example.com-ssl.conf
- Replace server_name example.com; with server_name example.com www.example.com;
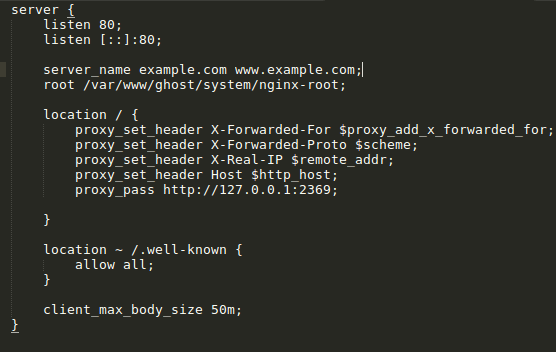
- After all, Configuration save the settings
- Restart Ghost and Nginx
ghost restart
sudo service nginx restart
- That’s all Successfully we install and Setup the Ghost CMS on Digitalocean
Ghost Blog Setup
- Configure your Ghost account
- Registration URL
https://example.com/ghost
- Click create new account
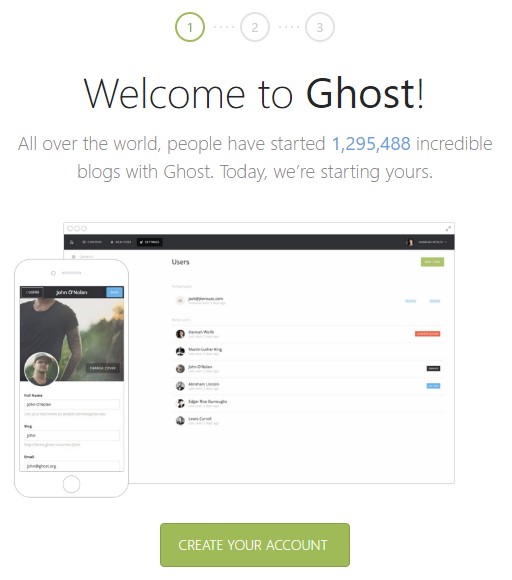
- In the second step create the Administrator account for your Ghost blog
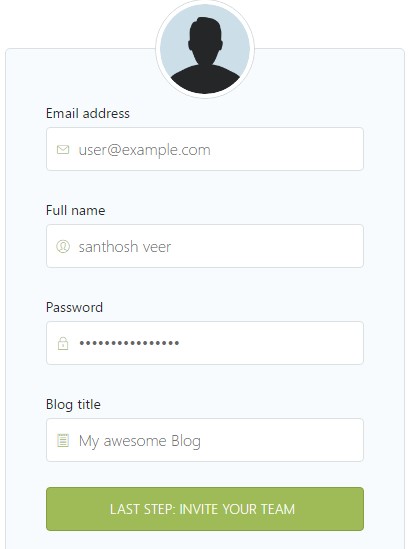
- After Filling the registration form click Last Step Button
- Next, it asks to add team members just skip that step you can add them later from your Ghost admin panel
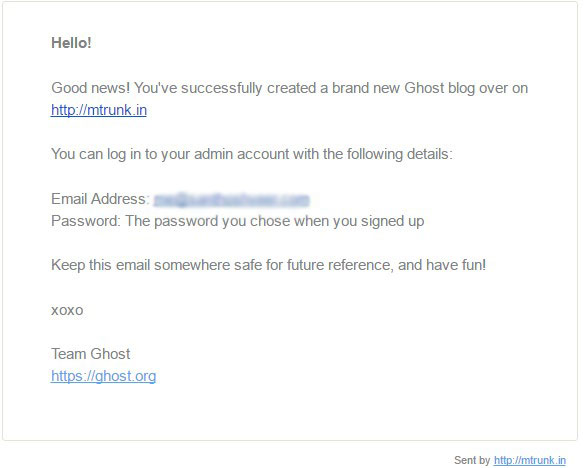
- Finally, It takes you to the Ghost admin Dashboard
- You will receive the email after the successful Registration
- Your Ghost Blog admin Login URL
https://example.com/ghost/
- That’s all your Ghost blog is ready – Happy Blogging 🙂
How to Update the Ghost Blog CMS into New version?
Here’s the One Line Command Just run this command line and Update your Ghost Blog into New Version.
ghost update
Some useful Command Lines to Manage Ghost blog on Digitalocean
Start and Stop the Ghost
ghost start
ghost stop
Restart the Ghost Blog
ghost restart
Restart the Nginx
sudo service nginx restart
From the Editor’s Desk
Hope this tutorial will help you to install Ghost on Digitalocean if you have any Doubts in this tutorial Feel Free to Comment Here I will Guide you.
Get the MYSQL password on /root/.digitalocean_password
- Official Ghost Installation and Upgrading Ghost Documentation – Learn Now
- Ghost-CLI Documentation – Read Now
Trending: How to Upload Images in Ghost Blogging Platform
Your feedback helps us improve Allwebtuts.com


